Garbage Disposal Repair Houston: How to Extend the Life of Your Unit
A garbage disposal is one of those small workhorses in a Houston kitchen that earns its keep every single day. It clears sink backups, keeps food scraps out of the trash, and cuts down on odors, all without taking up space. When it fails, you feel it immediately. The sink gurgles, the dishwasher backs up into the basin, and you start fishing out soggy lettuce by hand. Most units don’t die overnight though. They give off signs and respond well to care. A little maintenance, smart use, and timely garbage disposal repair can stretch a typical 7 to 12 year lifespan to the long end of that range.
I work on disposals across Houston, from older bungalows in the Heights to new builds in Katy. The water chemistry, plumbing layouts, and habits in real kitchens shape how these machines perform. If you want to avoid emergency calls and get more from your unit, a few practical steps will go a long way.
How a disposal actually works
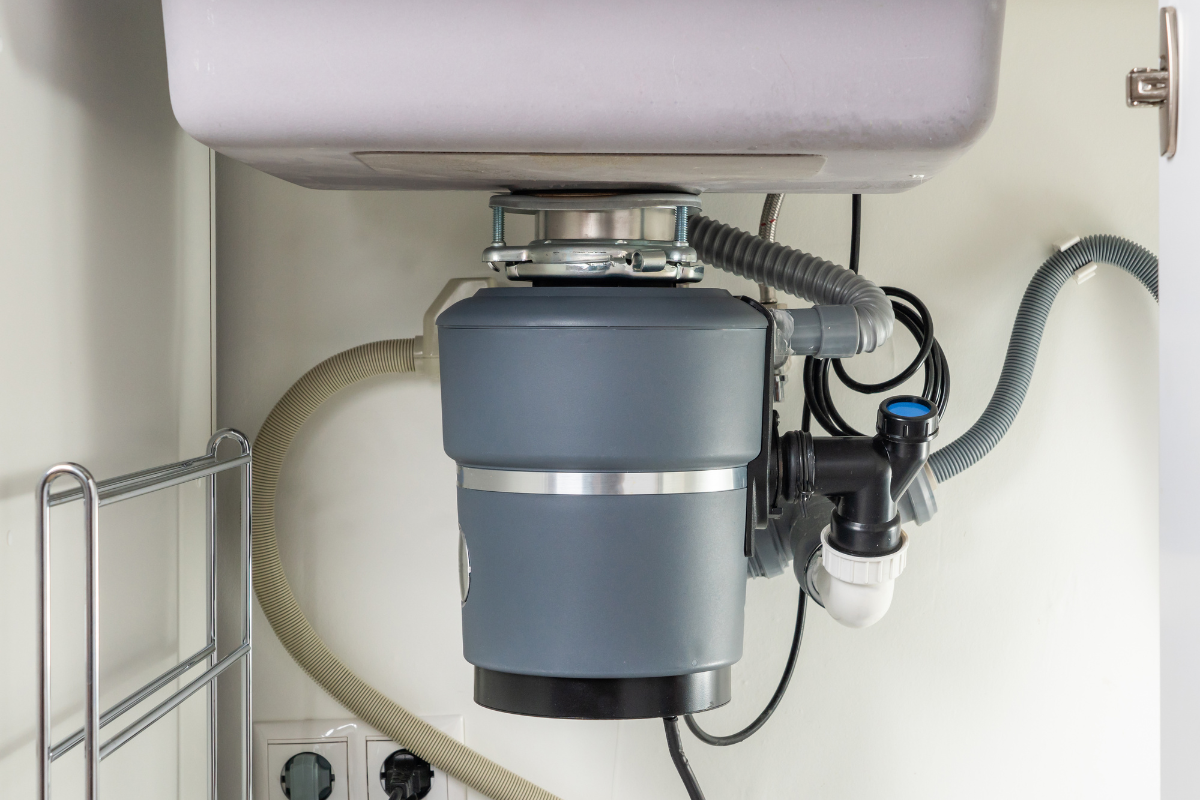
Inside that compact housing is an induction or permanent-split capacitor motor that spins a flywheel at around 1,700 to 2,800 rpm depending on the model. The flywheel carries two swiveling lugs often called impellers. They don’t chop like a blender. Instead, they sling food toward a fixed grind ring with sharp slots that shred scraps into slurry. Water carries the slurry through a curved discharge to the P-trap and out to the sewer line.
On the outside, you have the sink flange, a rubber splash guard, and a mounting system. Undersink, there’s a trap and venting that should match the local code. If you see constant clogs, the disposal might be fine while the issue sits in an undersized or poorly pitched drain.
Most household units fall into two types. Continuous-feed disposals run with a wall switch and take steady amounts of food. Batch-feed models require a stopper to activate and are common where child safety is a concern. Horsepower ranges from 1/3 to 1 HP for residential units. These numbers matter less than how and what you feed the machine.
Houston conditions that affect your disposal
Water in Houston leans hard, with mineral content that leaves scale on fixtures and inside housings. Scale stiffens the splash guard, narrows passages, and contributes to odors. The Gulf climate also means kitchens run warm, so fats solidify unpredictably. Bacon grease and pan drippings can stay semi-liquid long enough to get past the grind ring, then congeal downstream in a cooler section of drainpipe. Summer storms and power surges have a say too, especially in neighborhoods with older electrical panels.
Homes built across different decades bring variety under the sink. You’ll see galvanized branch lines in post-war houses, PVC in newer subdivisions, and a mix of slip joints, cleanouts, and dishwasher drain tie-ins. A disposal is only as reliable as the plumbing and power that support it.
Daily habits that extend lifespan
The best repairs are the ones you avoid. Day-to-day use decides whether your unit coasts or grinds itself into an early grave.
-
Run cold water at full flow before, during, and for 10 to 20 seconds after use. Cold water keeps fats solid so the grind ring can fracture them. The post-run flush clears the line. If you have a long horizontal branch to the stack, lean toward the 20-second end.
-
Feed gradually. A disposal handles a handful of scraps better than a packed handful at once. If you batch-cook on weekends, stagger the grind instead of emptying the cutting board in a single dump.
-
Avoid stringy, fibrous materials. Celery, corn husks, onion skins, and artichoke leaves wind around lugs and stall motors. If you insist on processing a small amount, cut the strands short and alternate with non-fibrous food and plenty of water.
-
No bones larger than chicken wing tips, no fruit pits, and no seafood shells. High-end 1 HP units will grind small bones, but the drain may not like the resulting grit. Think about the weakest link, which is often a 1.5 inch branch line with old scale.
-
Keep coffee grounds, rice, and pasta small and mixed. A teaspoon of grounds won’t doom your trap, but a cup can settle like sludge. Rice and pasta swell and turn to paste, especially in cooler pipes.
These aren’t rules from a manual so much as patterns I see when called for kitchen disposal repair in Houston homes. Many failures start with a clog that strains the motor, then trips the overload, then cooks the windings over a few weeks of struggle.
How to clean a disposal without damaging it
Odors and a blackened splash guard are early signs of neglected cleaning. Harsh chemicals look tempting, but they’re hard on seals and the environment. A safe, steady routine works better.
Start with power discipline. Switch off the wall control and, if available, unplug the unit. If it’s hardwired, flip the breaker. Removing the splash guard gives you better access if the design allows it. Wipe the underside of the guard and the upper throat with a sponge and a bit of dish soap. This is where grease coats and smells live. For the grind chamber, sprinkle half a cup of baking soda followed by half a cup of white vinegar. Let it fizz for several minutes. Rinse with cold water while the unit runs for 10 seconds. Drop in a few ice cubes with a teaspoon of coarse salt and run only briefly to scour the ring. Ice cleans, it doesn’t sharpen. The metal edges don’t behave like a knife.
If you want a fresh citrus smell, a small strip of lemon peel is fine, but full rinds can bind the lugs. For stubborn buildup, an enzyme-based drain cleaner designed for kitchen lines works well if used in moderation. Avoid bleach and solvent-heavy degreasers that can attack rubber.
A cleaning cycle every two to four weeks holds odors in check. If your household cooks often and sends more scraps down the sink, clean weekly for a month and see if the smell routine changes.
Basic troubleshooting you can do safely
A dead unit doesn’t always mean motor failure. Before searching for affordable garbage disposal repair, you can rule out a few common issues in minutes.
-
Check power. Verify the wall switch, test the GFCI outlet if it’s plugged in, and look for a tripped breaker. Many disposals include a red reset button on the bottom. If the motor overheated, wait five minutes, press the reset, and try again with cold water running.
-
Free a jam. If you hear a low hum without spinning, switch off power. Use the hex key that came with the unit, insert it into the center socket on the bottom, and work the flywheel back and forth. If you don’t have the key, a quarter-inch Allen wrench usually fits. Remove any visible object from the chamber with pliers, never with fingers. Restore power and test.
-
Cure small clogs. If water backs up but the unit spins, there may be a clog in the discharge elbow or P-trap. Place a shallow pan under the trap, loosen the slip nuts, and clear the trap and elbow. Reassemble with the gasket aligned and hand-tighten, then snug an extra quarter turn. Avoid overtightening which deforms plastic.
-
Fix a slow drain with a flush. After reassembly, run the disposal with cold water for 30 seconds, then fill the sink halfway with cold water and open the stopper to send a larger volume flush. If the branch line is clear, flow should improve.
If none of those change the behavior, the motor windings, bearings, or capacitor may be failing. At that point, a pro assessment makes sense. Many service calls in Houston fall under one hour if parts aren’t needed.
When repair makes sense, and when replacement is smarter
It’s tempting to keep a unit going with one more fix, free estimate garbage disposal but not every garbage disposal repair is cost effective. A general rule: if the unit is over eight years old and needs a motor or major bearing work, replacement often costs the same with a better outcome. Housing cracks or water intrusion into the motor compartment also tip toward replacement.
On the other hand, minor electrical issues, a stuck or failed reset, a leaky sink flange, a cracked discharge tube, or a worn splash guard are all good repair candidates. These parts cost modest amounts, and labor stays contained. Prices vary by brand and model, but in Houston you can expect a simple repair to fall in a practical range that keeps it under the cost of a new mid-grade unit plus labor.
If you’re shopping units during a replacement, focus on noise insulation and torque rather than just horsepower. Well-insulated 3/4 HP disposals hit a good middle ground for most households. If you cook for a large family or entertain often, 1 HP gets you reserve power and more robust mounts. Stainless grind chambers resist corrosion better in our harder water.
The installation details that make or break performance
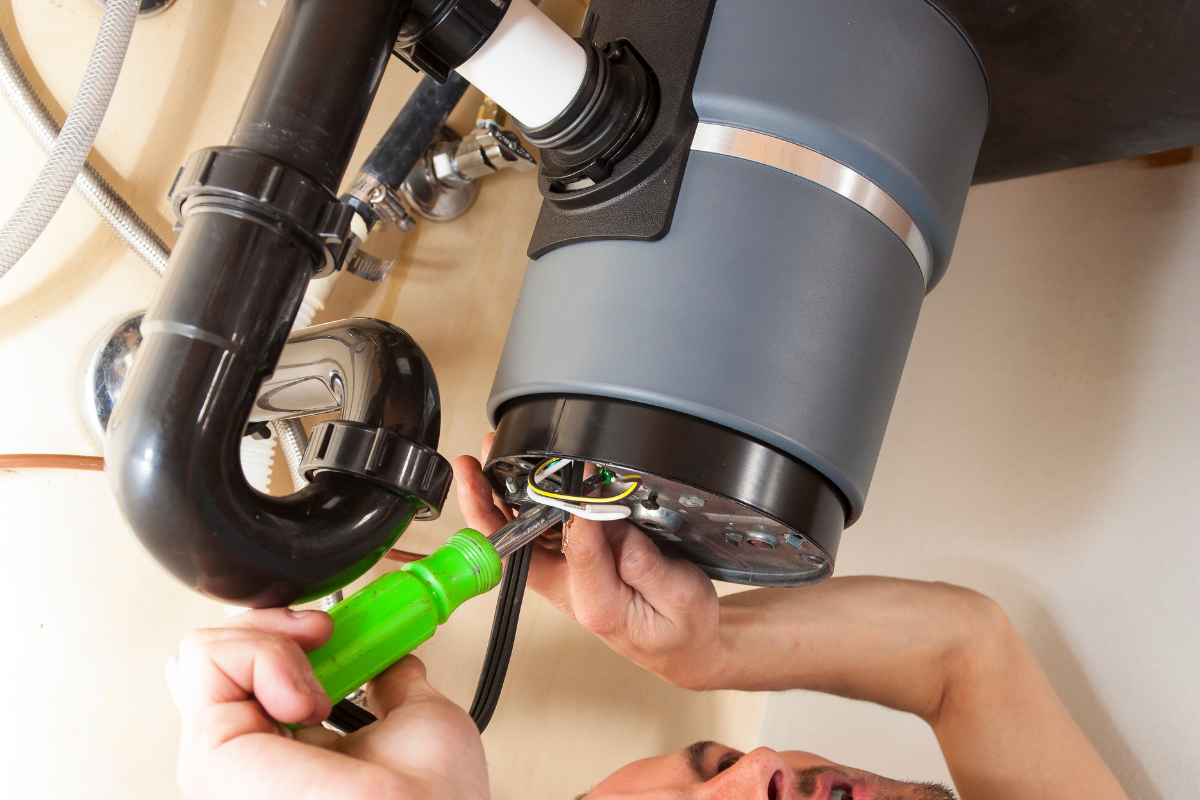
Garbage disposal installation Houston homeowners often attempt as a weekend project can go smoothly if a few non-negotiables are met. A solid mount matters more than a fast install. The sink flange needs plumber’s putty applied evenly, compressed to a thin bead that doesn’t squeeze out into the chamber. The mounting ring must lock evenly. A flange that tilts or a mount that’s not fully engaged leads to micro leaks that only reveal themselves as a damp cabinet near me garbage disposal installer months later.
For the dishwasher connection, knock out the drain plug on the disposal inlet if your dishwasher will drain through it, then remove the plug piece from the elbow so it doesn’t rattle inside the chamber. The dishwasher hose should loop up high under the counter or connect to an air gap, depending on local code and your sink layout. That high loop prevents backflow and recirculating debris into the dishwasher.
Wiring deserves attention. Some units come corded, others need a separate kit. If you’re hardwiring, the junction box should be accessible and connections made with the correct wire nuts and strain relief. A dedicated 15 amp circuit is common, though you’ll find shared circuits in older houses. If the unit trips breakers occasionally when combined with a high-draw appliance on the same circuit, consider an electrician’s visit to separate loads or verify breaker health.
Finally, trap geometry should respect gravity and code. Keep the P-trap directly under the disposal, not off to the side with a flat run. The outlet from the trap should slope slightly toward the wall line. If you have a double sink, a proper baffle tee helps distribute flow without sending pulverized scraps into the other basin.
Preventing leaks and cabinet damage
Leak calls often start with a musty smell or a loose bottle tipping over into a damp corner. There are three common leak points: the sink flange, the discharge connection, and the dishwasher inlet. The flange leak shows at the top of the unit. The discharge leak drips from the side elbow or from the gasket where the elbow meets the housing. The dishwasher leak appears where the hose clamps to the inlet nipple.
Gaskets compress over time, especially with temperature cycling from hot dishwater. Replacing them is quick. If you see corrosion or white mineral tracks on the elbow, swap it. Stainless replacements hold up better than thin, plated versions. For the sink flange, if you have mounting movement when you twist the unit by hand, the ring may not be fully locked or the putty has thinned. Re-seat the flange with fresh putty rather than piling on sealant from below.
For long-term protection, consider a shallow cabinet mat under the unit. It won’t fix a leak, but it will buy you time and keep particle board bases from swelling if a slow drip starts.
Noise, vibration, and what they tell you
Every brand has a sound. What you’re listening for is change. A hum without rotation indicates a jam or a failed start capacitor. A grinding rasp that wasn’t there last month may be a foreign object like a dropped screw or, less cheerfully, a failing bearing. Rattling can come from a misaligned mount or broken baffles inside the chamber.
If the unit vibrates enough to rattle dishes in the adjacent cabinet, check three things. First, the mount collar should be locked to its final position. Second, the rubber isolation gasket between the sink and the mount should be intact and seated. Third, the discharge pipe should not be under tension. A trap that forces the unit to sit twisted will transmit vibration. Correcting the alignment often quiets a “noisy” unit dramatically.
Some households tuck oversize items around the disposal. A cutting board leaning against the housing amplifies sound. Clear a few inches around the unit so the cabinet doesn’t act like a soundboard.
What an annual checkup covers
A quick, methodical inspection each year catches small issues before they turn into Saturday night emergencies. A pro or a confident homeowner can run through it in half an hour.
-
Inspect the electrical connection for heat discoloration, loose wire nuts, or a stressed cord. Verify the wall switch and GFCI function.
-
Check all gaskets and slip joints for weeping. Wipe everything dry, run the unit, then feel for fresh moisture.
-
Test the dishwasher drain. Run a short cycle and watch for backflow into the sink or disposal chamber. Adjust the hose loop or diagnose air gap issues as needed.
-
Evaluate the splash guard. If it’s stiff, torn, or won’t close the throat when idle, replace it. This small part is key to odor control and back-splash.
-
Clean the grind chamber and throat, then verify balance by running a few ice cubes with water. Listen for smooth spin-up and spin-down.
That minimal attention beats crisis calls. It also pairs well with other simple kitchen maintenance tasks like cleaning the aerator and testing the angle stops.
Cost expectations and what “affordable” actually means
Homeowners ask for affordable garbage disposal repair and expect a number that doesn’t punish them for being practical. Fair pricing in Houston reflects travel time, diagnosis, and the reality that many repairs involve simple parts. For a reset, jam clear, or gasket replacement, the total often lands in a modest range when scheduled during normal hours. After-hours emergencies carry premiums. If a unit is borderline and you’re already paying for a technician to be in the home, the delta between repair and replacement narrows. A straightforward swap with a like-for-like unit can be quick, while a switch from no disposal to new disposal is closer to a mini remodel and takes longer because of the sink flange, wiring, and trap adjustments.
If you’re comparing estimates for garbage disposal installation Houston contractors provide, ask whether the quote includes the cord kit if needed, the flange, haul-away of the old unit, and any trap rework. A low number that excludes hardware or haul-away looks friendly until the invoice adds line items. Clear scope is your friend.
Signs you should call a professional
DIY has a place, but disposals sit at the intersection of water and electricity, and mistakes add risk. Pick up the phone for these scenarios:
-
The breaker trips repeatedly even after clearing jams, or you smell electrical heat.
-
The unit leaks from the housing itself rather than a joint. That indicates a failed internal seal.
-
You’re replacing the sink or changing from a single to a double basin. Trap geometry and venting change with the layout.
-
There’s persistent slow drainage after trap cleaning, which points to a deeper line clog.
-
The disposal shares a circuit with other high-draw appliances and causes flickering lights or intermittent power loss.
A good service tech won’t just swap parts. They’ll look at the whole setup and give you the trade-offs. For example, I’ve advised clients to keep a mid-grade unit and spend the budget on correcting a flat run in the branch line. That fix solves the real problem and makes any disposal behave better.
Responsible use and the bigger picture
Houston’s wastewater system handles what we send it, but it rewards restraint. The less grease and fiber you grind, the fewer downstream clogs in your home and the fewer strainers city crews have to clear. If you compost, set aside vegetable peels and coffee grounds for the bin. Use the disposal for what doesn’t compost well or what you missed while scraping plates.
If you do run fats down by accident, follow immediately with cold water and a small amount of dish soap, then a long cold flush. Later that evening, do a hot water flush with the disposal off to push residual film farther out. You’re trying to prevent an overnight set in the trap.
Homeowners sometimes ask about enzyme pods marketed for disposals. A quality enzyme drain treatment used sparingly can keep biofilm at bay, especially in homes where the kitchen line collects from multiple fixtures. Use them monthly, not weekly. Too much enzyme plus warm Houston water can loosen sludge faster than you can flush it, turning a mild restriction into a clog if you’re not ready with volume.
A few real-world examples from local kitchens
In a Sharpstown rental, a 1/2 HP unit jammed every few weeks. The tenant was careful with scraps, so the pattern didn’t make sense. I pulled the trap, found nothing major, then checked the mount. The sink flange sat slightly off-level and the flywheel scraped a high spot when a small load entered. Re-seating the flange and correcting the mount ended the jams. The lesson: not every “weak motor” is a motor problem.
In Oak Forest, a family that meal preps for five installed a premium 1 HP disposal but kept clogging the branch line. The issue turned out to be a 10 foot flat run from a 1960s remodel. We re-pitched the line by half an inch and swapped a baffle tee that was catching fibrous bits. Their “bad disposal” behaved perfectly once the pipe flowed.
In Midtown, a condo with a combined dishwasher and disposal circuit tripped the breaker twice a week. The panel was modern, but the shared circuit ran close to capacity when the dishwasher heated water. An electrician moved the disposal to a dedicated 15 amp circuit, and we added disposal installation Houston a new cord kit with proper strain relief. No more trips, and the disposal started more confidently.
How to choose a new unit if replacement is on deck
Shopping by brand name alone is tempting. Look a layer deeper.
Consider the motor type. Induction motors are smooth and durable. Universal motors are lighter and cheaper, but they can be louder. Many quality disposals now include multi-stage grinding that reduces particle size and helps with challenging scraps.
Sound insulation matters in open-plan kitchens. Units with thicker wraps and anti-vibration mounts cost a bit more, but the difference in daily noise is obvious. If you have kids napping near the kitchen, you’ll appreciate the quiet.
Stainless components resist corrosion from hard water and cleaning agents. If you plan to keep the unit longer than five years, the upgrade pays off. Check that the unit accepts standard 3-bolt mounts, which makes future swaps simpler.
For homes with septic systems on the outskirts of Houston, pick a septic-safe model. These introduce enzymes or grind to finer output. Even then, use the disposal lightly and keep up with tank maintenance.
Simple weekly routine to keep things trouble-free
A short, repeatable habit keeps the system ready for heavy cooking days.
-
After dinner twice a week, run a cold-water flush for 20 seconds with the unit on, then 20 seconds with it off.
-
Wipe the splash guard and throat with a soapy sponge. Rinse with cold water.
-
If odors creep in, use the baking soda and vinegar fizz, wait five minutes, then flush.
-
Glance under the sink for dampness around joints and the base. A quick check catches leaks early.
-
Once a month, run a small batch of ice cubes and a teaspoon of coarse salt for a gentle scour.
That’s all most households need. If something feels off, address it quickly. Early attention prevents bigger bills.
Where professional service fits
There’s a healthy middle ground between do-it-yourself maintenance and calling for help at the first hiccup. If you’re comfortable with basic steps, you’ll prevent most issues. When you need a hand, look for providers who handle both garbage disposal repair and installation. That way, if repair isn’t the smart path, they can swap the unit cleanly the same visit.
Search for kitchen disposal repair Houston with an eye on reviews that mention punctuality, clear estimates, and tidy work. Ask if they stock common parts and mid-grade units on the truck. A stocked van avoids multiple trips and keeps your costs fair. If you’re focused on budget, let them know you want affordable garbage disposal repair options up front. Good technicians appreciate clarity and will outline the costs to fix versus replace so you can choose without pressure.
The payoff of steady care
A quiet disposal that simply works fades into the background of a good kitchen. It helps the sink drain cleanly, keeps odors from the bin under control, and lets you process small scraps without fuss. Most breakdowns I see come from preventable causes: neglected cleaning, fibrous overloads, or simple installation quirks. With a little attention, you can push a mid-range unit past a decade, avoid weekend emergencies, and keep the cabinet dry.
If your current unit feels tired, don’t wait for it to fail during a holiday meal. Take stock now. Clean it, listen to it, and check for leaks. If it needs help, schedule service during regular hours. And if you opt for a new unit, plan the installation with the drain and power in mind, not just the box on the store shelf. The combination of smart use, basic maintenance, and timely garbage disposal repair keeps your Houston kitchen flowing the way it should.
DYZ Plumbing, LLC
Address: 1220 Blalock Rd, Houston, TX 77055
Phone: (832) 877-9600