Houston Garbage Disposal Repair: Troubleshooting Made Easy
A garbage disposal tends to disappear into the background when it works, then suddenly becomes the loudest thing in the kitchen when it doesn’t. Houston homeowners see a steady stream of disposal issues tied to hard water, heavy cooking, and the city’s mix of older bungalows and new builds. I’ve crawled under enough sinks from the Heights to Pearland to know the patterns. Most problems are simple once you understand the mechanism, and most repairs are faster and cheaper than replacing the unit. The rest come down to knowing when to stop, shut off the power, and call someone who does Kitchen disposal repair Houston residents trust.
This guide walks through the symptoms I most often see, what usually causes them, and how to fix them safely. It also covers when a repair hits diminishing returns and it is smarter to replace the unit, including some notes on Garbage disposal installation Houston homeowners can plan for without surprises. If you want Affordable garbage disposal repair, your best first move is proper diagnosis.
What a disposal actually does
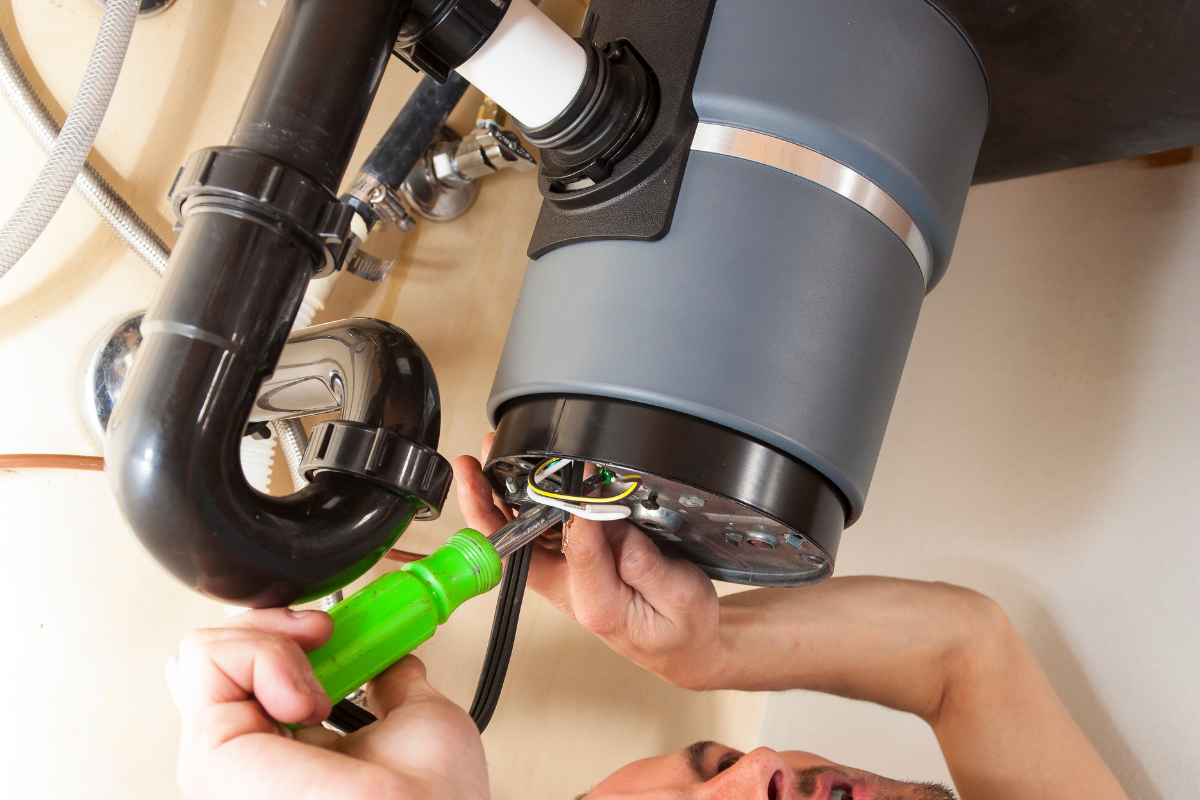
Inside the housing lives a small electric motor connected to a flywheel with two swinging impellers. There are no blades. Food is smashed by centrifugal force against a stationary grind ring, turning it into slurry that flows into the P‑trap. Two features protect the system: an internal overload switch that trips when the motor overheats or stalls, and a hex socket at the bottom that lets you manually turn the flywheel when it jams.
That’s the whole story. Understand those parts and most troubleshooting falls into place.
Safety that is not optional
Cut power before you put a hand near the sink opening. garbage disposal service near me Unplug the disposal or cut power at the breaker, then verify by flipping the wall switch. Use tongs or needle‑nose pliers to remove objects. Never reach in while power is connected. Water and electricity are a bad mix, and the space under a sink is cramped. A non‑contact voltage tester costs less than a mid‑range restaurant meal and earns its keep quickly.
Quick symptom map: where to start
Most calls start with one phrase: it hums, it leaks, it’s stuck, it’s dead, or it stinks. The fix follows the symptom.
It hums but does not grind
A humming motor signals power and a stalled flywheel. Houston kitchens see this after accidental pits, spoons, bottle caps, or fibrous foods like celery wrap around the impellers. If left humming, the motor overheats and trips the overload.
Start by pressing the red reset button on the bottom of the unit. If it clicks in, you were tripped. Next, insert a 1/4‑inch hex wrench into the bottom socket and gently rock left and right to free the flywheel. Remove debris from the top opening with tongs. Restore power, run cold water, and test. If it hums again and trips repeatedly, you may have a failing start capacitor or windings on older builder‑grade models that have lived a hard life.
It’s dead, no sound at all
Silence means you have a power issue or a failed switch. Plug‑in units sometimes work loose because of vibration, so check the outlet under the sink first. Test the GFCI on nearby outlets if your installer shared the circuit. Check the breaker panel, especially in older houses where a disposal and dishwasher share a 15‑amp circuit that’s borderline. Press the red reset under the unit. If none of that works, the wall switch could be bad or a direct‑wired unit might have a failed connection at the junction box. If you’re not comfortable with electrical testing, this is the point where an Affordable garbage disposal repair visit is cheaper than guessing and safer than fishing around live wires.
It spins freely but leaks
Disposal leaks have three common sources: the sink flange, the dishwasher inlet, and the discharge elbow. Each one has a distinct drip pattern.
A flange leak shows water collecting at the very top of the unit and running down the housing. Over time, Houston’s heat cycles and a few years of scrubbing can dry out the plumber’s putty. You’ll need to loosen the mounting ring, lift the disposal, remove the flange, clean the old putty, and reset it with fresh putty. A new rubber gasket underneath, if your model uses one, costs a few dollars and saves you doing it twice.
A dishwasher inlet leak shows a dribble on the small side nipple where the dishwasher drain hose attaches. The clamp may be loose or the knockout plug was never removed on a new install. If you just added a dishwasher and the disposal backs up during its cycle, that knockout plug is often the culprit. Knock it out with a screwdriver and hammer, then fish the metal slug out of the grinding chamber so you do not meet it again later.
A discharge elbow leak shows water at the side where the disposal meets the drainpipe. The rubber gasket inside the elbow can compress or crack. Re‑seat the elbow, replace the gasket, and tighten the metal slip ring evenly. Over‑tightening can warp thin plastic elbows, so aim for snug and dry.
It grinds poorly or clogs the sink
Weak grinding or frequent clogs point to habits, not just hardware. Run cold water before and after each use. Feed food gradually rather than dumping a full plate of rice or pasta at once. Houston families who cook a lot of beans and rice tend to see a paste build in the P‑trap, especially with older 1/3 HP disposals. Those motors bog down on dense loads. If you live with four or five people and cook daily, a 3/4 HP or 1 HP model makes a real difference.
If the sink backs up while the disposal runs, you likely have a clog downstream. Turn off the power, remove the P‑trap with a towel and bucket underneath, and clear the plug of paste or stringy material. If the trap is clear, the clog may be in the wall arm. A manual drum auger or a wet/dry vacuum on the drain can push it through. Avoid chemical drain cleaners in a disposal. They corrode aluminum housings and chew rubber parts, then you pay twice.
It smells like something crawled in and died
Odor means film. Fat coats the grind ring, and food sludge hides under the rubber splash guard. Clean both. With power off, scrub the underside of the splash guard petals with a brush and mild detergent. Run a handful of ice cubes with a tablespoon of rock salt to knock loose film from the grind ring, then rinse with cold water. Citrus peels help smell, but they do not clean by themselves. If odors return quickly, you likely have standing water in a low section of the drain line. Adjust the piping to rid the belly in the line.
The Houston factor: what local houses add to the mix
Age and layout matter. Bungalows from the 1940s and 1950s often have tight cabinets and shorter tailpieces that force odd angles. Newer homes in master‑planned communities sometimes have builder‑grade disposals sized for listing prices, not family use. Houston’s hardness levels vary, but many neighborhoods see scale build on metal components. That scale stiffens the splash guard, increases vibration noise, and dries out putty faster.
Rental properties add another variable: nobody knows what went down the drain, and households change. When I open a jammed unit in a rental, I find flatware about half the time. Owner‑occupied homes skew toward fibrous food jams and putty leaks.
When repair makes sense, and when to replace
A simple jam, reset, or gasket replacement is a clear repair. If the unit is under five years old and the motor is quiet once freed, fixing it is almost always the smart move. Parts are cheap and the job takes under an hour in most kitchens.
Replace when the housing is cracked, when you have repeated leaks at seams, or when the motor trips under light loads after you have cleared the chamber. If you own a 1/3 reset garbage disposal button HP unit in a busy kitchen and it clogs often, an upgrade saves your time and nerves. Insinkerator Badger‑class units do the job in lighter use. For households that cook daily, a 3/4 HP or 1 HP unit with stainless grind components runs quieter and lasts longer, especially with bones and denser scraps.
On costs, Affordable garbage disposal repair in Houston generally ranges from a quick service call for a jam or reset to a moderate fee if electrical troubleshooting or pipe rework is involved. Full replacement, including a decent mid‑range unit, usually falls into the low hundreds, depending on horsepower and sound insulation. If your sink flange and mounting assembly are compatible with the new brand, labor time drops. If not, expect longer to swap the mount and reseal the flange.
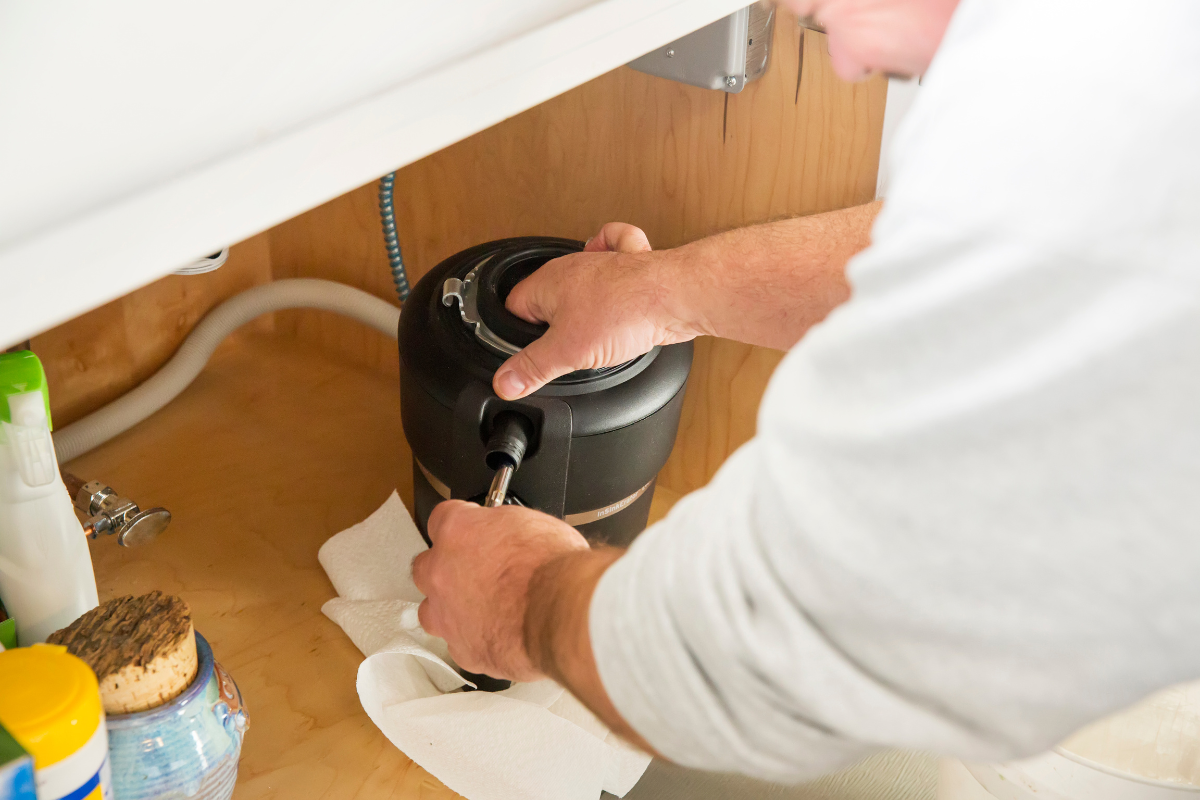
Step‑by‑step: freeing a jammed disposal safely
- Cut power at the plug or breaker. Confirm the switch does nothing.
- Insert a 1/4‑inch hex wrench into the bottom socket. Turn gently left and right until movement loosens.
- From above, use a flashlight and tongs to remove any debris. Never use your fingers on a live circuit.
- Press the red reset button under the unit. It should click and stay in.
- Restore power, run cold water, and test. Feed a few ice cubes to confirm smooth operation.
That five‑step routine resolves most humming units within minutes. If it hums again immediately, stop. A stuck impeller arm or failing motor needs a deeper look.
Leak repair at the sink flange: what actually works
People reach for silicone because it’s tidy and familiar. Plumber’s putty, not silicone, is the standard under the flange on most stainless sinks. Silicone adheres aggressively and makes the next repair a chore. Putty creates a compressible, watertight ring. Roll a rope of putty about the thickness of a pencil, lay it around the flange, press into place, and tighten the mounting hardware evenly. Scrape the squeeze‑out clean. If your sink is granite or composite, check the manufacturer’s guidance. Some call for a specific sealant rather than oil‑based putty.
Don’t over‑tighten the mounting ring. You want even compression, not a bowed flange. After reassembly, fill the sink with two inches of water and let it sit for a few minutes. If it stays dry underneath, pull the stopper and let the surge run through while you watch all joints.
Clearing a clog without damaging pipes
Disposals often get unfair blame for clogs caused by long horizontal runs or bellies in the line. If the P‑trap is clear, use a hand auger through the trap arm toward the wall. A wet/dry vacuum can be surprisingly effective on mushy clogs like rice paste. Seal the sink opening with a wet rag around the vacuum hose, pull a vacuum for ten seconds, then release. Alternate three or four times. The change in pressure often breaks the plug free without chemicals.
If you go the auger route, be gentle. Galvanized trap arms in older homes can be thin and pitted. Replace crusty sections rather than forcing tools through them. PVC holds up better but will leak at the slip joints if you reassemble without resetting the washers correctly. Orient beveled washers with the bevel facing the joint, not backward. A dab of plumber’s grease on washers helps them seat without twisting.
Odor control that lasts longer than citrus
Real cleaning beats perfume. Pull the splash guard if your model allows it, and soak it in warm, soapy water. Scrub under the flange lip where film hides. Run ice and salt to scour the grind ring. Then chase with a short burst of dish soap and cold water to carry the loosened film away. If odors persist, consider the drain layout. A trap that sits too far from the disposal outlet or a run that holds water will grow bacteria. Fix the slope and support the pipe to eliminate sag.
Noise reduction without a new unit
Disposals live or die by their mounts. A loose mounting ring rattles. Tighten evenly. If the splash guard has stiffened, it amplifies vibration. Replacing the guard with a fresh, flexible one can cut sound dramatically. Rubber isolation on the discharge elbow helps too. If the cabinet resonates, adhesive sound pad squares on the inner walls will dampen the drum effect. On higher‑end units, built‑in insulation and better bearings are what you pay for. If late‑night noise bothers the household, that upgrade earns its keep.
What not to put down the disposal
Rules vary by household size and unit horsepower, but a few items cause trouble across the board. Coffee grounds pack like wet sand and settle in the trap. Starchy foods like rice, pasta, and mashed potatoes swell and paste into bends. Fibrous peels and husks wrap and stall. Bones are fine for higher‑end units in small amounts, but handfuls of rib bones will punish smaller motors. Fats and oils coat and collect debris. Better to wipe pans with paper towels and trash them.
A quiet trick I share with clients: freeze lemon slices and vinegar in ice cube trays. Every couple of same-day garbage disposal repair weeks, run a few cubes through with cold water. You get the scouring effect of ice, a mild acid to loosen scale, and a fresh scent that lasts longer than peels alone.
Installation notes for Houston kitchens
If you’re replacing the unit or planning a new Garbage disposal installation Houston contractors will recognize a couple of local quirks. Many code inspectors expect an air gap or high loop for dishwashers that drain through a disposal. Even if your area doesn’t enforce an air gap, at minimum create a high loop with the dishwasher drain hose secured under the countertop. That prevents sink water from siphoning back into the dishwasher during a backup.
Direct‑wire disposals are common in older homes. Converting to a plug‑in with a dedicated outlet and switch adds safety and makes future servicing easier. A licensed electrician can add a GFCI‑protected receptacle in the adjacent cabinet and a proper wall switch if the existing setup is suspect. It’s a minor project that pays off the first time you need to unplug the unit.
Undermount sinks need careful support. A heavy 1 HP disposal hanging from a thin stainless lip can stress epoxy anchors on stone. Use the support strap or bracket recommended by the manufacturer, or add a simple shelf bracket inside the cabinet to carry the load. I’ve seen undermounts pull just enough to break the flange seal every six months until we relieved the weight.
How to keep costs down without cutting corners
Owners often ask for Affordable garbage disposal repair, and the answer is a mix of DIY and choosing where to pay for expertise. Do the basics yourself: clear jams with the hex wrench, clean the splash guard, and check outlet and reset buttons. If you see a simple leak at the discharge elbow, a gasket and ten minutes fix it. If you are resealing a flange or dealing with wiring, bring in help. Repair techs charge less for a straightforward job than for the aftermath of a well‑intended but messy attempt.
Parts run modest: gaskets and clamps are pocket change, a new mounting assembly sits in the tens, while full units climb with horsepower and insulation. Consider your usage pattern honestly. A family of five that cooks nightly will spend more once on a stronger unit, but they save over years in reduced clogs, smoother operation, and fewer service calls.
When the problem is upstream or downstream
Not every disposal issue is the disposal’s fault. Low water pressure on the cold side starves the chamber and leads to jams. A sagging drain line after a renovation traps sludge and guarantees odors. If the sink is slow even without the disposal running, you likely have buildup in the wall or further along. In a few neighborhoods with older cast iron stacks, emulsified grease solidifies later in the run. Clearing that needs a proper auger or hydro‑jetting, not a new disposal.
I remember a townhome near Midtown where a brand‑new, 3/4 HP unit stalled every weekend. We found a flat run of three feet under the slab before the pipe dropped. Rice and pasta set like glue in that flat. Re‑pitching that line fixed everything. The disposal had taken the blame, when the real issue was the slope.
Warranty and brand quirks that save you money
Many disposals carry multi‑year warranties on parts and labor if installed by a pro. Keep the paperwork. If your Badger‑class unit fails within two years, a local service network often handles a swap with minimal labor. Premium models extend that window, sometimes up to seven or ten years on corrosion and grind components. If you call for Kitchen disposal repair Houston services and mention the model and serial number, they can tell you in seconds if you’re covered.
Some brands use interchangeable mounts. If your old unit and the new one share a mount, you can swap the body without resealing the flange. That cuts the job time in half and reduces leak risk. Ask for that cross‑compatibility when shopping.
A quick checklist to prevent the next repair
- Run cold water before, during, and 15 seconds after grinding.
- Feed scraps gradually, avoiding dense loads of starch or fiber.
- Clean the splash guard monthly and run ice with coarse salt.
- Keep the dishwasher drain in a high loop or air gap.
- Check for drips under the sink twice a year and reseal early.
Follow those five habits and you avoid nine out of ten problems I see on callouts.
Calling in a professional without delay
There is a line where DIY stops paying. If you smell burning, if the unit trips immediately after resets, if water drips from the motor housing, or if you are staring at suspicious wiring under a damp sink, close the cabinet and call someone who does Garbage disposal repair daily. A half hour of proper testing catches electrical faults, failing bearings, or hairline cracks you will not see with a flashlight. For homeowners who prefer one visit and done, many companies bundle diagnosis with a repair credit if you proceed, which keeps the total reasonable.
For those planning a remodel or upgrading appliances, loop disposal decisions into the plan early. If you are swapping the sink or countertop, the ideal time for a new unit is when the flange is being set. That way your installer can match the mount, run a clean new discharge, and set a proper support. You avoid the extra labor of repeating steps later.
The bottom line for Houston kitchens
A disposal is simple, which is what makes it dependable. Most issues come down to jams, gaskets, and habits. A hex wrench, a new gasket, and a few minutes of careful work will fix the majority of cases. When repair does not make economic sense, choosing the right replacement, installed correctly, gives you quiet, reliable service for years. Whether you are tackling a quick fix on your own or scheduling Kitchen disposal repair Houston technicians can complete in under an hour, the path is straightforward once you know what you’re looking at.
Treat the disposal as a little workhorse that needs cold water, moderate loads, and an occasional cleaning. Handle the basics. Call a pro when electricity, leaks inside the housing, or repeated overheating enters the picture. That balance keeps repairs affordable, downtime short, and your kitchen running the way it should.
DYZ Plumbing, LLC
Address: 1220 Blalock Rd, Houston, TX 77055
Phone: (832) 877-9600